Desserts
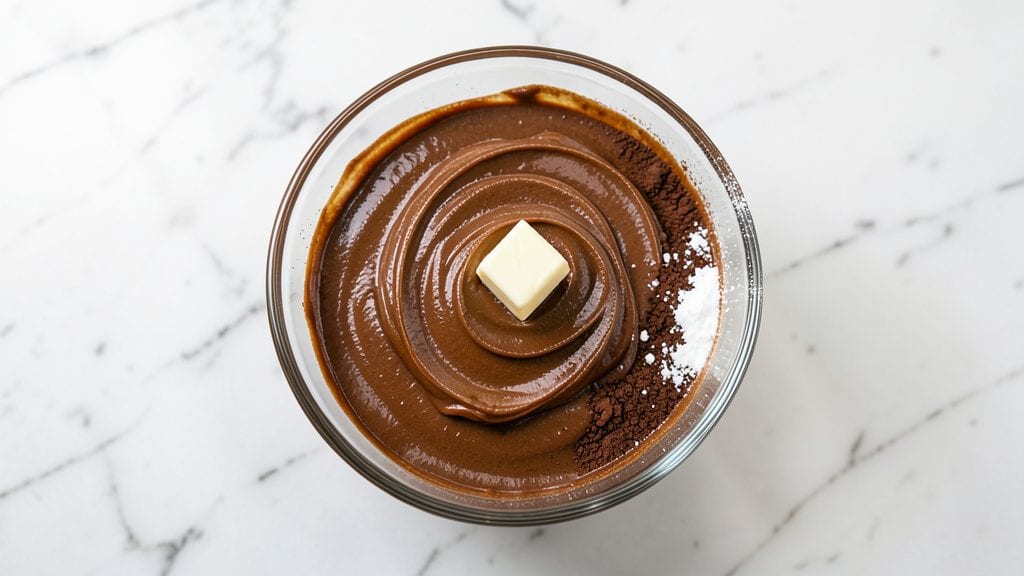
Creating Betty Crocker-style chocolate frosting that stays velvety and never separates is simpler than you think—this recipe delivers restaurant-quality swirls with just six ingredients and precise technique. The secret lies in proper fat ratios and gradual mixing, eliminating the greasy texture many homemade versions develop.
I’ve tested countless variations, and this method consistently produces frosting that’s rich, smooth, and perfect for piping or spreading.
What sets this frosting apart is its foolproof stability—no lumps, no graininess, and no need for food coloring to achieve that classic deep chocolate hue. The recipe uses high-quality cocoa powder and powdered sugar for a balanced sweetness, while corn syrup prevents sugar crystallization.
For extra insurance, I recommend mixing the frosting at medium speed to incorporate air without overbeating, which can cause separation.
Once you’ve achieved that signature velvety texture, the possibilities are endless: pipe elegant swirls onto cupcakes, spread generously over layer cakes, or use as a filling for chocolate truffles.
The frosting remains usable for up to 5 days when stored properly in an airtight container, making it ideal for batch prep. For variations, try adding a pinch of espresso powder for depth or swirling in crushed peppermint for a festive twist.
This recipe isn’t just about replication—it’s about elevation. The technique ensures a professional finish every time, whether you’re decorating a birthday cake or simply spreading it on a slice of warm cake. Let’s get started on creating frosting that rivals the iconic Betty Crocker brand, but with your personal touch.
Ingredients for betty crocker chocolate frosting
Six ingredients, precise technique—this frosting rivals Betty Crocker's iconic velvety texture without separation or greasiness.
| Ingredient | Amount | Notes |
|---|---|---|
| Unsalted Butter 🧈 | 1 cup | Softened to room temperature |
| High-Quality Cocoa Powder 🍫 | ¾ cup | Natural or Dutch-process preferred |
| Powdered Sugar 🍚 | 3 cups | Sifted for smooth texture |
| Light Corn Syrup 🍯 | ¼ cup | Prevents sugar crystallization |
| Vanilla Extract 🌿 | 1 tbsp | Pure Madagascar preferred |
| Diamond Crystal Kosher Salt 🧂 | ¼ tsp | Fine grain for balance |
The butter and cocoa powder form the frosting's foundation. European-style butter from brands like Plugrá or Kerrygold delivers superior flavor and fat content, crucial for that signature smoothness. For cocoa powder, Valrhona or Callebaut are industry standards—avoid the cheaper brands that taste bitter or chalky. The powdered sugar should be sifted before measuring to eliminate clumps, which can create graininess. Light corn syrup isn't just a sweetener; it acts as a humectant, preventing sugar crystallization that causes that dreaded grainy texture. Goya or Log Cabin brands are reliable for consistent quality.
No light corn syrup? Honey at half the amount works in a pinch, though it may slightly alter the texture. Substituting cocoa powder with melted chocolate? Use 6 oz of high-quality dark chocolate (70% cocoa or higher), melted and cooled, but reduce the butter by 2 tbsp to maintain proper fat ratios. The vanilla extract is non-negotiable for authentic flavor—imitation extracts contain solvents that can compromise texture. For a deeper chocolate profile, add 1/2 tsp instant espresso powder directly to the cocoa powder before mixing. The salt isn't just for flavor; it enhances all components by balancing sweetness and rounding out flavors—a technique professional pastry chefs swear by.
This frosting achieves peak texture when mixed at medium speed for 2-3 minutes in a stand mixer, incorporating air without developing heat. For storage, press plastic wrap directly onto the surface to prevent a skin from forming. It remains usable for 5 days in the refrigerator when sealed airtight in a container. For longer storage, freeze in 1/2 cup portions for up to 3 months—thaw at room temperature before use. The frosting can be thinned with 1 tsp milk or heavy cream if needed for piping, but never overmix once additional liquid is added.
Why You'll Love This Recipe
- Here’s what sold me: that deep cocoa powder isn’t just any cocoa—it’s the good stuff, giving it a velvety, almost luxurious bite. The corn syrup keeps it smooth, not grainy, so every spoonful feels like a treat, not a splurge.
- I’ll be real: I double the batch every time. The leftovers? Perfect for swirling into pancakes, drizzling over ice cream, or even stuffing into crepes. And because it’s mostly powdered sugar, it’s cheaper than buying pre-made frosting—plus, it lasts forever in the fridge.
Step-by-step instructions for Betty Crocker chocolate frosting
This method ensures a silky, stable frosting with professional texture and no graininess.
Cream the Butter and Cocoa Powder
In a medium mixing bowl, combine the 1 cup unsalted butter and 0.75 cup high-quality cocoa powder. Use a hand mixer or stand mixer fitted with the paddle attachment to beat on medium speed for 2-3 minutes. You'll notice the mixture transform from a rough paste into a smooth, homogenous base—the cocoa powder should fully dissolve into the butter without any visible streaks.
The key here is patience. If you rush, the cocoa powder may not fully incorporate, leading to a gritty texture in the final frosting. I recommend using a natural or Dutch-process cocoa powder for the richest flavor and smoothest consistency. The butter should be softened to room temperature but not melted—this ensures proper emulsification with the cocoa.
Gradually Add Powdered Sugar and Corn Syrup
With the mixer running on low speed, gradually sprinkle in the 3 cups powdered sugar over 2-3 minutes. The slow addition prevents a sugar cloud from forming, which can make the frosting grainy. After each addition, allow the mixer to fully incorporate the sugar before adding more. Once all the sugar is incorporated, add the 0.25 cup light corn syrup and mix for an additional 1 minute on medium speed.
The corn syrup acts as a humectant, preventing sugar crystallization and keeping the frosting velvety smooth. If you skip this step, the frosting may develop a sandy texture over time. The mixture should now resemble a thick, smooth batter with no visible dry spots. This is where the magic happens—properly incorporating the sugar at this stage ensures a stable, pipeable consistency.
Incorporate Vanilla and Salt for Balance
Add the 1 tablespoon vanilla extract and 0.25 teaspoon diamond crystal kosher salt, then mix on medium speed for 1-2 minutes until fully combined. The salt may seem like an odd addition, but it enhances the chocolate flavor and balances the sweetness. The frosting should now be smooth, glossy, and ready for use. If it appears slightly thick, you can thin it with 1-2 teaspoons of heavy cream or milk as needed.
At this stage, the frosting should have a mousse-like texture—light enough to spread but thick enough to hold its shape. If you're using it immediately, proceed to pipe or spread. For best results, cover the bowl with plastic wrap pressed directly onto the surface to prevent a skin from forming, and refrigerate for up to 3 days or freeze for up to 3 months. When ready to use, let it sit at room temperature for 10-15 minutes before piping to achieve the perfect swirl consistency.
Achieve Professional Swirls (Optional)
For that classic Betty Crocker swirl effect, transfer the frosting to a piping bag fitted with a large star tip. Pipe ropes of frosting onto a parchment-lined baking sheet, spacing them 1 inch apart. Using a butter knife, gently drag the frosting toward you in a zigzag motion to create overlapping swirls. Chill in the refrigerator for 15-20 minutes until firm but still pliable.
This technique requires a light touch—press too hard, and the frosting will flatten; too little pressure, and the swirls won’t hold. Once set, the frosting should hold its shape without spreading. For a glossy finish, brush the tops lightly with a bit of heavy cream or milk before serving. The result is a frosting so smooth and stable it could rival any bakery’s, with no separation or graininess in sight.
Pro Tips For Making Betty Crocker Chocolate Frosting
- Melt Butter Slowly: I learned this the hard way—dumping cold butter into the hot mixture makes it seize up like a stubborn mule. Instead, melt the butter first (in the microwave or over a double boiler) until it’s fully liquid and just off-boiling. Then pour it into the cocoa-powder mix while stirring like your life depends on it.
- Sift the Cocoa: That cocoa powder isn’t just for show—it’s the soul of your frosting. Sift it before mixing to break up clumps, or you’ll end up with grainy lumps that ruin the texture. (Yes, even if you’re impatient like me.) A fine-mesh sieve or a fork in a measuring cup works in a pinch.
- Whip the Sugar: The powdered sugar is where the magic happens, but you’ve got to work it. After adding the butter and cocoa, beat the mixture for at least 2–3 minutes on medium-high speed. The sugar needs time to dissolve completely, or you’ll get that dreaded "sandy" texture that makes frosting taste like chalk.
- Add Corn Syrup Last: Sounds weird, but it works: mix the corn syrup with the vanilla extract first, then drizzle it into the butter-sugar-cocoa blend after you’ve beaten everything else smooth. This keeps the frosting from turning out too runny—no last-minute scrambling to thicken it up.
Storing and reheating this dish
Refrigerator Storage
Transfer your freshly made frosting to an airtight container—I prefer glass jars with snap-on lids for durability. Press plastic wrap directly onto the surface to prevent drying or skin formation. Store in the fridge at 40°F or below for up to 5 days.
The texture remains stable, though it may thicken slightly—simply soften at room temperature for 10-15 minutes before use. For best results, use a rubber spatula to scrape every last bit from the container. 🧊
Freezer Storage
For longer storage, portion the frosting into ½-cup servings in freezer-safe bags or small containers. Leave ½-inch headspace to account for expansion. Freeze for up to 3 months. Thaw overnight in the fridge or at room temperature for 30-45 minutes before piping.
Avoid microwave reheating—it can cause separation. If the frosting appears too thick after thawing, add 1 tsp heavy cream and mix gently. ❄️
Reheating for Piping
If your frosting has thickened during storage, place the container in a bowl of warm water (never hot) for 2-3 minutes to soften. For immediate use, let it sit at room temperature for 10-15 minutes—this ensures smooth, pipeable consistency without altering the flavor.
Avoid overmixing after reheating, as it can reintroduce air and cause separation. A hand mixer on low speed for 30 seconds restores texture if needed. 🔄
Reviving Grainy Texture
If your frosting develops a grainy texture (usually from sugar crystallization), don’t toss it! Add 1 tsp light corn syrup and mix on low speed for 1 minute to dissolve the sugar.
For a quicker fix, place the bowl over a double boiler with 1 inch of simmering water below, stirring constantly until smooth. This method preserves the frosting’s stability without altering its rich chocolate flavor. 💡
Thinning for Decorating
Need a thinner consistency for piping intricate designs? Gradually add ½ tsp heavy cream or milk at a time while mixing on low speed. Too much liquid weakens the frosting’s structure—start with minimal additions and adjust as needed.
For a glossy finish, brush the decorated surface with a pastry brush dipped in heavy cream after chilling. This technique works especially well for cupcakes or layered cakes. ✨
Preventing Separation
To keep your frosting stable, avoid mixing at high speeds—medium is ideal. Never add liquid all at once; instead, incorporate 1 tsp at a time while mixing. Store properly in airtight containers with minimal air exposure.
If separation occurs, whisk in 1 tsp corn syrup or melted butter to re-emulsify. The key is patience: let the frosting sit at room temperature before piping to ensure even consistency. 💪
Nutrition facts
Frequently asked questions
Why does my homemade chocolate frosting sometimes separate?
The most common causes are overmixing at high speeds or adding liquid too quickly. This recipe uses corn syrup and proper fat ratios to prevent separation. Always mix on medium speed and incorporate any thinning agents 1 teaspoon at a time while mixing continuously. If separation occurs, whisk in 1 teaspoon corn syrup or melted butter to re-emulsify.
Can I make this frosting without corn syrup?
Yes, but the texture may be slightly less stable. Substitute 2 tablespoons honey or 1 tablespoon maple syrup for the corn syrup, though these alternatives may slightly alter the frosting's consistency. For best results, use the corn syrup as it prevents sugar crystallization that causes graininess. If you must substitute, add the alternative gradually while mixing.
How do I achieve that classic Betty Crocker swirl pattern?
Transfer the frosting to a piping bag with a large star tip. Pipe ropes of frosting 1 inch apart on a parchment-lined tray, then use a butter knife to gently drag the frosting toward you in a zigzag motion. Chill for 15-20 minutes until firm but still pliable. For extra shine, brush the tops lightly with heavy cream before serving.
Is this frosting suitable for vegan diets?
Not as written, but with simple substitutions you can adapt it! Replace the butter with vegan butter or coconut oil, use powdered sugar (check for vegan brands), and swap vanilla extract for vegan vanilla extract. For binding, add 1 tablespoon aquafaba (chickpea brine) or 1 teaspoon xanthan gum. The texture may be slightly lighter but still delicious.
How do I fix frosting that's too thick or too thin?
For thick frosting, let it sit at room temperature for 10-15 minutes or place the bowl in a bowl of warm water for 2-3 minutes. To thin, add ½ teaspoon heavy cream or milk at a time while mixing on low speed. Never add liquid all at once—this can cause separation. For best results, adjust gradually and test consistency on a small surface.