Breakfast & Brunch
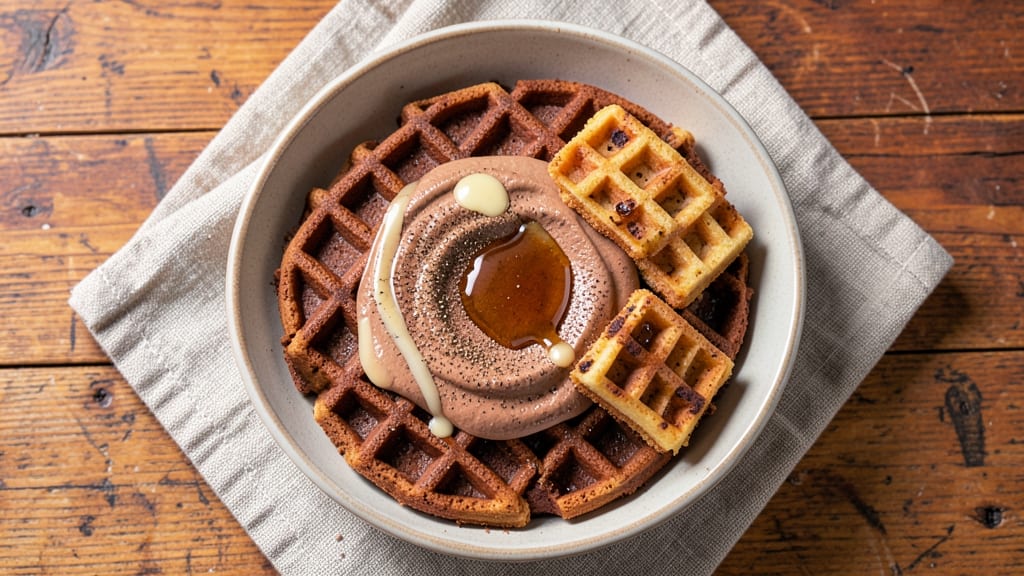
This chocolate protein waffle recipe delivers the perfect balance of rich cocoa flavor and plant-based protein for a breakfast that fuels your day without the sugar crash. After years of perfecting vegan protein waffles, I’ve cracked the code for achieving that ideal crispy-yet-tender texture while keeping it packed with nutrients.
The secret lies in using chickpea flour as the base—it adds natural protein and a subtle nutty depth that complements the chocolate perfectly.
The beauty of these waffles is their versatility—whether you’re fueling a post-workout recovery or craving a satisfying breakfast, they’re designed to keep you full for hours.
With just five simple ingredients and 15 minutes of prep time, you’ll have golden-brown waffles that taste indulgent but are secretly packed with plant power. The recipe includes a foolproof method for achieving crisp edges and a fluffy interior every time, no matter your skill level.
What makes these waffles truly special is how they adapt to your dietary needs—gluten-free, vegan, and high-protein without sacrificing flavor. Top them with almond butter and sliced bananas for a balanced breakfast, or drizzle with melted dark chocolate and crushed nuts for a decadent treat.
The possibilities are endless, but the foundation remains the same: a rich, chocolatey waffle that’s as nutritious as it is delicious.
Ready in under 20 minutes, these waffles are perfect for busy mornings or meal prep—just store them in the fridge and reheat for a quick, protein-packed breakfast anytime.
The recipe scales easily, so whether you’re feeding one or a crowd, you’ll have a batch of crispy, chocolatey waffles that taste like a dessert but fuel like a meal.
Ingredients for chocolate protein waffle
Five plant-powered staples transform into crispy, chocolatey waffles packed with protein.
| Ingredient | Amount | Notes |
|---|---|---|
| Chickpea Flour 🌾 | 1 ½ cups | Gluten-free, for protein base |
| Unsweetened Cocoa Powder 🍫 | ½ cup | High-quality Dutch-processed |
| Almond Milk 🥛 | 1 ¼ cups | Unsweetened, unscented |
| Maple Syrup 🍯 | ¼ cup | Pure, grade B for depth |
| Flaxseed Meal 🌰 | ¼ cup | Ground fresh for binding |
| Vanilla Extract 🌿 | 1 tbsp | Pure alcohol-free preferred |
| Baking Powder 🧂 | 1 tsp | Aluminum-free for crispiness |
| Salt 🧂 | ½ tsp | Fine sea salt preferred |
| Dark Chocolate Chips 🍫 | ½ cup | 70% cacao or higher |
| Coconut Oil 🥥 | 2 tbsp | Melted for crisp edges |
| Banana 🍌 | 1 whole | Ripe, mashed for moisture |
| Chia Seeds 🌱 | 1 tbsp | Optional, for omega boost |
Chickpea flour is the star here—it delivers that nutty depth while keeping the waffles gluten-free and protein-rich. Bob's Red Mill or Anthony's Goods are my go-to brands for the best texture. The cocoa powder? Valrhona or Guittard make all the difference—avoid the bargain-bin stuff. Ripe bananas are key for natural sweetness and moisture, so grab a couple that are just starting to brown. Coconut oil adds that crispy edge, but if you're avoiding coconut, avocado oil works just as well. The flaxseed meal? Bob's Red Mill again—just grind whole flaxseeds in a coffee grinder for the freshest bind.
No chickpea flour? Substitute with brown rice flour or oat flour at the same ratio, but texture will differ slightly. Running low on cocoa? Carob powder works in a pinch, though it lacks that rich chocolate flavor. Almond milk can be swapped for soy or oat milk—just use unsweetened. The banana is non-negotiable for texture, but if you're out, 1/4 cup unsweetened applesauce gets you close. Dark chocolate chips? Enjoy Life brand is my go-to for vegan-friendly options, but any 70%+ cacao chips will do. Need extra protein? Add 1/4 cup plant-based protein powder to the batter, but expect a denser texture.
These waffles reheat beautifully—just pop them in a toaster or air fryer at 350°F for 2-3 minutes to restore crispiness. Store in an airtight container for 3 days in the fridge, or freeze for up to 3 months. I like to portion them into single-serving bags so I can grab one straight from the freezer. For extra indulgence, brush the warm waffles with melted coconut oil before serving. The batter keeps for 3 days in the fridge, so make a double batch—trust me, you'll want seconds.
Why You'll Love This Recipe
- Here’s what sold me: deep cocoa flavor that tastes indulgent, but the protein-packed chickpea flour keeps it legit. Drizzle with maple syrup, and it’s like dessert for breakfast—without the sugar crash. (Yes, even on a Tuesday night.)
- No Mixing Madness: I swear by this batter—just whisk, pour, repeat. The chickpea flour and flaxseed meal blend into a smooth, lump-free mix with zero fuss, and honestly? That’s half the battle won. No sifting, no measuring cups out the wazoo—just four ingredients and a spatula.
- Rich Without Guilt: Here’s what sold me: deep cocoa flavor that tastes indulgent, but the protein-packed chickpea flour keeps it legit. Drizzle with maple syrup, and it’s like dessert for breakfast—without the sugar crash. (Yes, even on a Tuesday night.)
- Breakfast or Snack: These waffles are my secret weapon for lazy mornings and post-gym fuel. Freeze half the batch for grab-and-go protein, or serve them warm with nut butter for a weekend treat. My daughter picks out the flaxseed bits, but still asks for seconds.
Step-by-step instructions for chocolate protein waffles
Here’s how to make these protein-packed waffles in under 30 minutes—no special equipment needed.
Whisk Dry Ingredients for a Smooth Batter
In a large mixing bowl, combine the 1.5 cups chickpea flour, 0.5 cup unsweetened cocoa powder, 1 tsp baking powder, and 0.5 tsp salt. Use a whisk to break up any lumps in the cocoa powder—this ensures your waffles have a velvety texture without gritty pockets. I like to sift the dry ingredients through a fine-mesh strainer for extra smoothness, but a good whisk works just as well.
Set the bowl aside while you prepare the wet ingredients. The key here is to avoid overmixing later—once the wet ingredients join the dry, we only want to stir until just combined. This prevents dense, cakey waffles and keeps them light and airy.
Mix Wet Ingredients and Flaxseed Egg Substitute
In a separate bowl, mash the 1 whole ripe banana until smooth—no need to strain the skin, just break up any large chunks. Add the 1.25 cups almond milk, 0.25 cup maple syrup, 2 tbsp melted coconut oil, 1 tbsp vanilla extract, and the 1 tbsp chia seeds. Stir well to combine, then let the mixture sit for 5 minutes—this gives the chia seeds time to absorb liquid and create a gel-like consistency, acting as our egg substitute for binding.
Next, add the 0.25 cup flaxseed meal to the wet ingredients and stir vigorously for 1 minute. You’ll notice it thickens slightly as the flaxseed absorbs moisture. This step is crucial for the waffles’ structure—flaxseed meal provides both protein and the binding power of eggs. If the mixture looks too thick after mixing, add 1-2 tablespoons of almond milk to reach a pourable consistency.
Combine Wet and Dry for a Thick, Gluten-Free Batter
Pour the wet ingredients into the bowl with the dry ingredients. Using a spatula, gently fold everything together until just combined—you should still see streaks of cocoa powder. Overmixing develops gluten in chickpea flour, which can make the waffles tough. Fold in the 0.5 cup dark chocolate chips by hand, reserving a few for topping if you like.
The batter should be thick but pourable, like pancake batter. If it’s too stiff, add 1 tablespoon of almond milk at a time until it reaches the right consistency. Let the batter rest for 5 minutes while you preheat your waffle iron. This resting time allows the flaxseed to fully activate and the flour to hydrate, resulting in waffles with a perfect crumb.
Cook Waffles to Golden Perfection
Preheat your waffle iron to 375°F—this high temperature ensures crispy edges and a tender interior. Lightly grease the plates with coconut oil using a paper towel to prevent sticking. Pour ½ cup of batter onto the center of the iron, spreading it evenly to the edges. Close the lid and cook for 4-5 minutes, until the waffles are golden brown and the iron’s indicator light turns off.
Here’s the pro tip: Don’t open the iron to check on the waffles—this releases steam and can make them gummy. Instead, listen for a slight pop or click from the iron, which signals they’re ready. Use a thin spatula to carefully remove the waffles and transfer them to a wire rack. Repeat with the remaining batter, adding a few extra chocolate chips to the top of each waffle if desired.
Serve Warm with Toppings (Optional)
Serve the waffles immediately while they’re still warm and crisp at the edges. They’ll soften slightly as they cool, but the texture remains perfect for 5-10 minutes after cooking. For extra indulgence, top with a dollop of Greek yogurt, a sprinkle of cinnamon, or a drizzle of melted dark chocolate. These waffles are rich enough to stand alone, but the toppings add a fun contrast to the deep cocoa flavor.
Real talk: These waffles are best enjoyed fresh, but you can reheat them in a 350°F oven for 3-4 minutes if needed. Store leftovers in an airtight container for up to 3 days, though I’ve never had any last that long. The combination of protein from chickpea flour and flaxseed keeps you full for hours, making them the ultimate breakfast or dessert option.
Pro Tips For Making Chocolate Protein Waffle
- WHISK THE FLAX FIRST: Mix the flaxseed meal with almond milk before adding anything else—let it sit for 5 minutes to thicken properly. I used to skip this, and my waffles turned out gummy instead of fluffy. Trust me, that extra wait makes a real difference in texture.
- USE A MEDIUM-HIGH HEAT: Crank your waffle iron to medium-high heat—too low, and the edges burn before the center cooks. Too high, and you’ll get a crispy shell with a raw middle. Watch for bubbles forming on the surface before flipping; that’s your cue.
- SIFT THE COCOA POWDER: Lightly sift the unsweetened cocoa powder into the dry ingredients to break up clumps—this prevents lumps in your batter. I learned this the hard way after scraping a stubborn cocoa glob off my waffle iron. A 2-minute job saves 10 minutes of frustration later.
- SWAP MAPLE FOR SYRUP: If your waffles taste too sweet, reduce the maple syrup by 1-2 tablespoons and add a pinch of vanilla extract instead. The vanilla enhances the chocolate flavor without overpowering it. (Yes, even if you’re not a fan of vanilla, it works here.)
Serving suggestions for chocolate protein waffle
Protein-Packed Breakfasts
Start your day with a powerhouse breakfast by pairing these waffles with 1 scoop vanilla plant-based protein powder mixed into the batter for extra protein—about 20g per serving.
Top with ½ cup Greek yogurt (or coconut yogurt for vegan) and 1 tbsp almond butter for a balanced combo of protein, healthy fats, and fiber. This combo keeps you full for 4+ hours and fuels your morning workout. 💪
Fruit & Nut Toppings
Brighten up the rich chocolate flavor with fresh fruit like sliced strawberries or banana slices. Drizzle with warm maple syrup and sprinkle 1 tbsp chopped pecans or walnuts for crunch.
For a tropical twist, add mango chunks and a pinch of cinnamon. The fruit adds natural sweetness while balancing the protein-rich waffles.
Decadent Dessert Style
Turn these into a dessert by topping with dairy-free whipped cream (like CocoWhip) and a sprinkle of sea salt. Add dark chocolate shavings or a few chocolate-covered espresso beans for extra indulgence.
Serve with a scoop of vegan vanilla ice cream for a satisfying treat that still fits into a balanced diet. 🍫
Meal Prep Breakfasts
Make these waffles ahead for grab-and-go breakfasts. Store in an airtight container with parchment paper between layers to prevent sticking. Reheat in a toaster or air fryer at 350°F for 2-3 minutes to restore crispiness.
Pack with nut butter packets and a small container of chia pudding for a portable, protein-rich meal on busy mornings.
Coffee & Tea Pairings
Pair your waffles with a cold brew coffee or matcha latte to cut through the richness. The bitterness of coffee enhances the chocolate flavor, while the earthy notes of matcha complement the nutty chickpea base.
For a non-caffeinated option, try golden milk (turmeric latte)—its warm spices add a cozy contrast to the crispy waffles.
Kid-Friendly Servings
Kids love these waffles when you turn them into fun shapes using a waffle iron with fun molds (like stars or dinosaurs). Top with colorful sprinkles or a smiley face made from peanut butter and banana slices.
Serve with a side of apple slices and a small cup of unsweetened applesauce for a balanced, kid-approved meal. 🌟
Nutrition facts
Frequently asked questions
Can I make these waffles without chickpea flour?
Yes! For a gluten-free option, substitute with brown rice flour or oat flour at the same ratio (1:1). If you're okay with gluten, all-purpose flour works too, but the texture will be slightly denser. The key is to keep the protein content high—add 1/4 cup plant-based protein powder if needed for extra nutrition.
Why do my waffles turn out dense instead of crispy?
Overmixing the batter or skipping the 5-minute rest before cooking is usually the culprit. Stir just until combined, and let the batter sit while preheating the iron. Also, ensure your waffle iron is at 375°F—lower temps make them gummy. Grease the plates well with coconut oil to prevent sticking and promote crispiness.
How do I boost the protein content even more?
Add 1/4 cup plant-based protein powder (vanilla or unflavored) to the batter for an extra 10-12g protein per serving. You can also fold in 2 tbsp ground flaxseed or 1/4 cup hemp seeds for added protein and nutrients. Just reduce the almond milk by 1-2 tbsp to maintain the right consistency.
Can I freeze these waffles for later?
Let them cool completely, then stack with parchment paper between layers in an airtight container. Freeze for up to 3 months. To reheat, pop them in a 350°F oven for 3-4 minutes or use a toaster until crispy. They’ll taste almost as good as fresh!
What’s the best way to store leftovers?
Keep them in an airtight container at room temp for 1 day or refrigerate for up to 3 days. Reheat in a toaster or air fryer to restore crispiness. For longer storage, freeze as mentioned above. The flaxseed and chickpea flour help preserve freshness, but they’re best enjoyed fresh!