Desserts
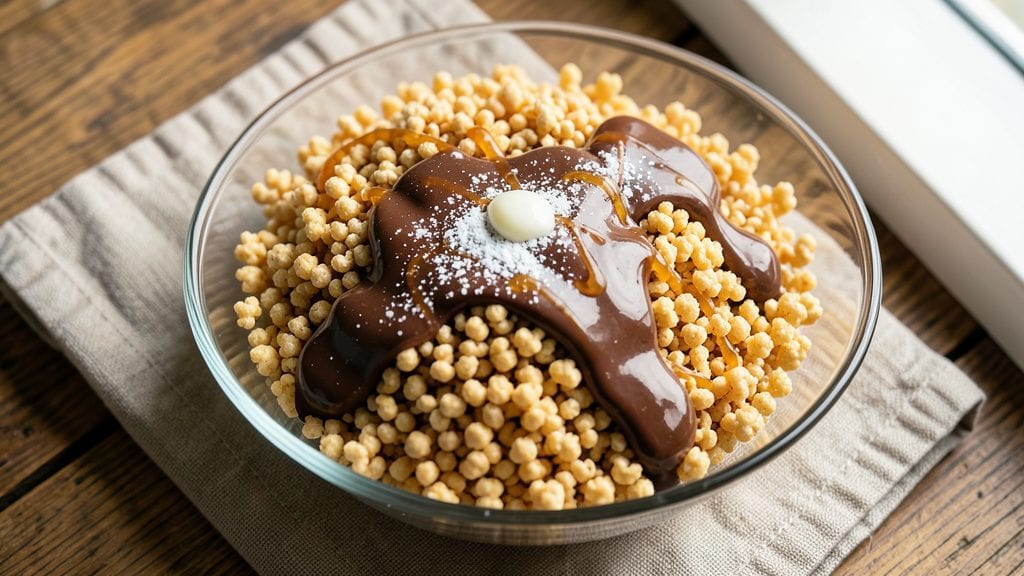
A chocolate puffed rice recipe transforms simple pantry staples into a dessert that’s equal parts nostalgic and indulgent. The magic happens when crispy puffed rice meets rich melted chocolate, creating clusters that balance crunch and velvety cocoa in every bite.
I’ve perfected this method over years of testing—no fancy equipment, just precision timing and a few key techniques.
The result is a dessert that’s surprisingly easy to make yet feels like a gourmet treat. Whether you’re recreating the classic Japanese choco rice or adding your own twist—like toasted nuts or sea salt flakes—this recipe delivers a perfect balance of textures and flavors.
Ready in under 15 minutes, it’s the ideal no-bake solution for satisfying chocolate cravings without the fuss.
Ingredients for chocolate puffed rice
Pantry staples and premium chocolate create clusters that balance nostalgic crunch with velvety cocoa perfection.
| Ingredient | Amount | Notes |
|---|---|---|
| Puffed Rice Cereal 🍚 | 4 cups | Lightly toasted for enhanced crunch |
| Unsweetened Baking Chocolate 🍫 | 12 oz | High-quality for rich cocoa flavor |
| Heavy Cream 🥛 | 1 cup | Full-fat for velvety texture |
| Unsalted Butter 🧈 | ½ cup | Cold, cubed for smooth melting |
| Granulated Sugar 🍚 | ¼ cup | Fine grain preferred |
| Vanilla Extract 🌿 | 1 tsp | Pure, high-quality preferred |
| Diamond Crystal Kosher Salt 🧂 | ¼ tsp | Fine grain for even distribution |
| Toasted Slivered Almonds 🌰 | ½ cup | Optional for added texture |
| Flaky Sea Salt 🧂 | 1 tbsp | Optional garnish for contrast |
The puffed rice forms the crunchy backbone of this dessert, so choose a high-quality brand like Quaker or Lotus. Lightly toast it in a dry pan for 30 seconds to amplify its natural crispness before combining with chocolate. For the baking chocolate, Ghirardelli or Lindt deliver superior cocoa intensity—avoid the lower-quality bars that can taste bitter. The heavy cream must be cold to prevent premature melting when mixed with butter. If you can't find full-fat, European-style cream, heavy whipping cream works in a pinch, though it won’t be as luxurious. Butter should be cold and cubed; using softened butter risks a greasy texture in the final clusters.
No baking chocolate? High-quality dark chocolate bars (70% cocoa or higher) melted with 2 tablespoons of coconut oil mimic the texture closely. Substituting powdered cocoa for baking chocolate requires adding 1 tablespoon of corn syrup per ounce to compensate for the lack of fat. For the toasted almonds, pre-toasted nuts from Trader Joe’s or Whole Foods save time, but toasting your own in a 350°F oven for 8-10 minutes enhances flavor. The flaky sea salt (like Maldon) is optional but transforms the dish—sprinkle it just before serving so it doesn’t dissolve into the clusters. If you’re avoiding nuts, crushed pretzels add a salty crunch without altering the core recipe structure.
Store the clusters in an airtight container between layers of parchment paper to maintain crispness. They’ll keep at room temperature for up to 5 days, though the texture softens slightly after 2 days. For longer storage, freeze in a single layer on a tray, then transfer to a sealed bag—thaw at room temperature for 10 minutes before serving. The toasted almonds and flaky salt should be added fresh to preserve their texture. Portion into small jars for gifts or lunches—they’re perfect for on-the-go chocolate cravings. Reheat clusters in a 200°F oven for 3-5 minutes to restore crispness if they’ve softened.
Why You'll Love This Recipe
- I’ll be real: this recipe is my secret weapon for feeding a crowd without breaking the bank. A bag of puffed rice lasts forever, and baking chocolate is cheaper than most candy bars. Plus, leftovers? They’re even better the next day—if there are any, because it disappears fast.
- Five-Ingredient Magic: I swear, this recipe lives up to the hype—just puffed rice, chocolate, cream, butter, and sugar. That’s it. No fancy techniques, no last-minute grocery runs. Honestly, I’ve made it while waiting for dinner to cook, and it still comes out rich and velvety every time.
- Craving-Worthy Crunch: The contrast is what makes this dish ridiculous good: that light, airy puffed rice crunch against the silky chocolate-cream filling. Between us, it’s the kind of texture combo that makes you pause mid-bite. And the chocolate? It melts just enough to coat everything without being heavy.
- Dessert That Works: Here’s what sold me—this is my go-to for impromptu gatherings, lazy Sundays, or when I need a quick treat after dinner. Serve it warm with a sprinkle of flaky salt, or let it cool for a no-bake snack. My kids grab it straight from the fridge, and my partner sneaks seconds when he thinks I’m not looking.
Step-by-step instructions for chocolate puffed rice clusters
Here's the precise method for creating decadent chocolate clusters with perfect texture balance.
Melt Chocolate and Butter for a Smooth Base
In a medium heatproof bowl, combine the 12 ounces of unsweetened baking chocolate with the 0.5 cup of unsalted butter. Place the bowl over a saucepan of simmering water, ensuring the bottom doesn't touch the water. Stir gently until the chocolate and butter melt completely, creating a glossy, velvety mixture. Remove from heat and let cool slightly for 2 minutes—this prevents the cream from seizing when added.
The chocolate should reach a temperature of around 100°F before adding the cream. If you're unsure about the temperature, simply touch the back of your hand to the mixture—it should feel warm but not hot enough to cause discomfort. This careful temperature control ensures the cream incorporates smoothly without breaking.
Incorporate Cream and Sugar for Rich Flavor
Gradually whisk in the 1 cup of heavy cream and 0.25 cup of granulated sugar into the chocolate mixture. Begin with low heat if needed to maintain a gentle temperature, whisking constantly until everything combines perfectly. Add the 1 teaspoon of vanilla extract and 0.25 teaspoon of diamond crystal kosher salt, whisking until fully integrated. The mixture should now be thick but pourable, with a luxurious sheen that indicates proper emulsification.
This is where the magic happens—the cream should create a ribbon-like trail when you lift the whisk, and the sugar should dissolve completely. If the mixture appears too thick, gently reheat for 10 seconds while whisking. The goal is a consistency that coats the back of a spoon but still flows freely when poured.
Lightly Toast the Puffed Rice for Enhanced Crunch
In a dry skillet over medium heat, toast the 4 cups of puffed rice cereal for 3-4 minutes, stirring constantly. You're looking for a subtle golden color and a nutty aroma—this enhances the cereal's natural crunch without burning. Immediately transfer the toasted rice to a large bowl and set aside. If using, toast the 0.5 cup of slivered almonds in the same skillet for 2-3 minutes until fragrant, then add them to the bowl as well.
The toasting step is crucial—it deepens the rice's flavor and prevents it from becoming soggy when coated. Toasting also helps the chocolate adhere better to each piece, creating those perfect clusters. Work quickly once the rice is toasted to maintain its crisp texture.
Combine and Cluster for Perfect Texture
Pour the chocolate mixture over the toasted puffed rice and almonds, stirring gently but thoroughly to ensure even coating. Use a rubber spatula to work the mixture through the rice, breaking up any large clumps. The chocolate should cling to each piece, creating a glossy, velvety coating that contrasts beautifully with the crisp rice.
Transfer the mixture to a parchment-lined baking sheet and spread it into an even layer. Using a fork, gently pull the mixture apart to create individual clusters about 1-2 inches in size. This step requires patience—don't force the clusters, but rather let them form naturally as you work the mixture. The clusters should hold their shape when lifted but still maintain a delicate, airy texture.
Set and Garnish for Restaurant-Worthy Presentation
Let the clusters cool and set at room temperature for 1 hour. They should firm up but remain slightly soft to the touch. Once set, sprinkle each cluster with a pinch of flaky sea salt to enhance the chocolate's natural sweetness and add a sophisticated contrast. Serve immediately or store in an airtight container at room temperature for up to 5 days.
The clusters should have a perfect balance of textures—crisp rice, creamy chocolate, and a delicate crunch from the almonds. Each bite should deliver a harmonious blend of sweet, nutty, and salty flavors. For best results, serve at room temperature to appreciate the full range of textures and flavors.
Pro Tips For Making Chocolate Puffed Rice
- Toss Rice Cold: Puffed rice absorbs liquid like a sponge—if you dump it into warm cream, you’ll end up with a soggy, gluey mess. Chill the cereal in the freezer for 10 minutes first, then toss it into the chocolate mixture while it’s still cold. This keeps those crisp edges intact longer.
- Melt Chocolate Slow: I used to blast baking chocolate in the microwave, only to end up with grainy, seizing messes. Instead, melt it in a heatproof bowl over a pot of barely simmering water (double boiler), stirring every 30 seconds. If it starts to separate, just whisk in a splash of warm cream to smooth it out.
- Whip Cream Early: Heavy cream’s magic fades fast—if you wait until the last minute to whip it, you’ll get clumpy, uneven pockets of air. Whip it to stiff peaks before mixing it with the chocolate, then gently fold it in. This ensures a light, airy texture instead of a dense, pudding-like center.
- Sweeten Gradually: Dumping all the sugar at once makes the mixture too stiff to fold properly. Start with half, taste, then add the rest a tablespoon at a time while stirring. You’re aiming for a balance—sweet enough to taste, but not so heavy that the rice turns to mush. (Yes, even if you’re impatient like me.)
Essential equipment for chocolate puffed rice
Heatproof Bowls
I swear by a double boiler setup for melting chocolate—it’s foolproof and prevents seizing. My go-to is a stainless steel mixing bowl (like the OXO Good Grips) placed over a saucepan of simmering water.
The key is ensuring the bowl’s bottom never touches the water to avoid steaming the chocolate. For a budget-friendly option, a glass measuring cup works too, but stainless steel distributes heat more evenly. 🌡️
Whisk and Spatulas
A balloon whisk (I use the Cuisinart Stainless Steel) is essential for combining the chocolate and cream smoothly. The flexible wires create a vortex that incorporates air, giving your clusters a lighter texture.
For spreading and scraping, a heat-resistant silicone spatula (like OXO Good Grips) is a game-changer—it won’t melt or scratch your bowls. Keep one nearby to scrape every last drop of chocolate from the bowl.
Skillet for Toasting
Toast your puffed rice in a 10-inch nonstick skillet (I love All-Clad Stainless) over medium heat. Nonstick prevents burning, and the larger surface area ensures even toasting. If you’re toasting almonds too, use the same skillet—just reduce heat slightly to avoid scorching.
A wire whisk helps stir continuously for even browning. For extra control, a cast iron skillet (like Lodge) adds even heat distribution, but it requires more attention to prevent sticking.
Parchment Paper
Line your baking sheet with heavy-duty parchment paper (I prefer Kirkland Signature) to prevent clusters from sticking. The paper’s texture also helps create crisp edges on your clusters. For easy transfer, use a pizza peel or large spatula to slide the clusters onto plates.
Pro tip: Cut the parchment into 12x18-inch sheets to fit standard baking sheets perfectly, minimizing waste. ✨
Fork for Clustering
The secret to perfect clusters? A stainless steel fork (like Cuisinart’s 3-piece set). Use it to gently pull apart the mixture on the parchment, creating those signature 1-2 inch clusters. The tines help separate the mixture without crushing it.
For larger batches, a bench scraper works too—just be gentle to maintain the delicate structure. Avoid plastic forks; they can melt when handling warm chocolate.
Storage Containers
Store your clusters in airtight glass containers (I use Le Parfait jars) to preserve crispness. Glass keeps the clusters from absorbing odors and maintains their texture longer than plastic. For gift-giving, layer clusters between parchment paper in a clear acrylic box (like IKEA’s 365+) to showcase their beauty.
If freezing, use quart-sized freezer bags with 1 inch of headspace to prevent freezer burn. 💫
Nutrition facts
Frequently asked questions
Why does my chocolate puffed rice turn out too sticky?
The most common cause is adding cream too quickly or not cooling the chocolate mixture enough before combining. Always let chocolate cool to 100°F and whisk in cream gradually over low heat. If it's still sticky, chill the mixture for 10 minutes before shaping clusters.
Can I make this recipe without baking chocolate?
Yes! Use high-quality dark chocolate bars (70% cocoa or higher) plus 2 tablespoons coconut oil per ounce of chocolate. Melt them together using the same double boiler method. For powdered cocoa, mix 1 tablespoon corn syrup per ounce to mimic fat content. The texture will be slightly less glossy but still delicious.
How do I prevent the puffed rice from getting soggy?
Toast the rice until it's lightly golden (about 3-4 minutes) and work quickly after combining with chocolate. Spread clusters in a single layer on parchment and let them set at room temperature for 1 hour before storing. For extra crispness, store in an airtight container with parchment between layers.
What's the best way to store these clusters?
Keep them in an airtight glass container at room temperature for up to 5 days. For longer storage, freeze in a single layer on a tray, then transfer to a sealed bag. Thaw at room temperature for 10 minutes before serving. Add toppings like nuts or salt fresh to preserve texture.
Can I make this vegan?
Replace butter with vegan butter or coconut oil, use coconut cream instead of heavy cream, and opt for vegan baking chocolate. The clusters will still be crispy but with a slightly different flavor profile. For extra richness, add 1 tablespoon maple syrup** to the mixture.