Beverages
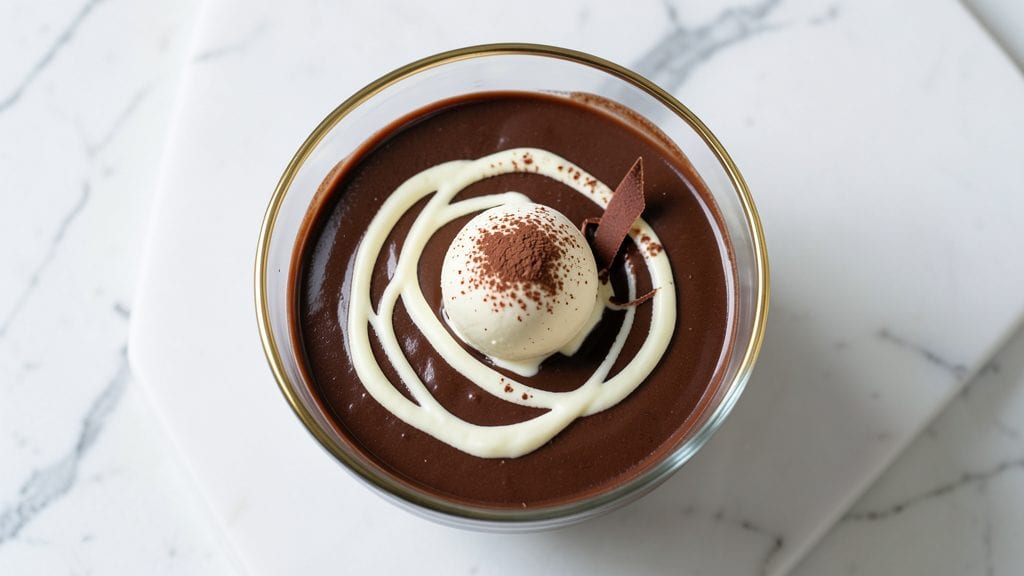
This chocolate shot recipe delivers a bold, velvety burst of cocoa in just seconds—perfect for an instant energy boost or dessert upgrade. The secret lies in balancing high-quality chocolate with a touch of cream or alcohol, creating a rich, silky texture that melts on the tongue.
I developed this version after years of experimenting with quick dessert solutions, and it never fails to impress.
What makes this recipe special is its simplicity: just three core ingredients come together with minimal effort. The key is precise temperature control—melt the chocolate gently over a double boiler or in short bursts in the microwave to avoid graininess.
Once combined, the mixture should be smooth enough to pour but thick enough to hold its shape when chilled.
The result is a luxurious, intense chocolate shot that pairs beautifully with coffee, cocktails, or even as a standalone treat. The deep cocoa flavor hits immediately, while the cream or alcohol adds a velvety finish.
Serve chilled in small glasses with a sprinkle of cocoa powder or crushed nuts for a professional touch.
These shots are ideal for parties, dessert bars, or when you crave chocolate without the fuss. The recipe scales easily, so you can make a batch ahead and store it in the fridge for up to a week. Let’s make them!
Ingredients for chocolate shot
Three core ingredients plus a few finishing touches—this chocolate shot recipe delivers restaurant-quality intensity with minimal effort.
| Ingredient | Amount | Notes |
|---|---|---|
| High-Quality Dark Chocolate Bar 🍫 | 4 oz | 70% cocoa or higher, chopped |
| Heavy Cream 🥛 | ¼ cup | Full-fat for smooth texture |
| Vanilla Extract 🌿 | ½ tsp | Pure vanilla for aroma |
| Unsalted Butter 🧈 | 1 tbsp | For extra richness |
| Cocoa Powder 🍫 | 1 tbsp | For garnish, optional |
| Granulated Sugar 🍚 | 1 tsp | Adjust to taste |
| Kosher Salt 🧂 | ¼ tsp | Pinch for balance |
| Brandy or Dark Rum 🍷 | 1 tsp | Optional, for depth |
The chocolate is non-negotiable here. Valrhona or Ghirardelli bars elevate the flavor, but any 70%+ cocoa works. Chop it into small, even pieces for consistent melting—large chunks can create uneven texture. Heavy cream should be cold when added to prevent premature melting. If you're feeling adventurous, Wahlburgers or Trader Joe's carry excellent options for both chocolate and cream. For a boozy twist, Kahlúa or Godiva liqueur adds depth without overpowering the cocoa.
No heavy cream? Coconut cream or half-and-half works in a pinch, though the texture will be slightly lighter. Short on vanilla? Vanilla bean paste adds flecks of flavor, or a pinch of cinnamon gives warmth. The butter is optional but recommended—it rounds out the richness. For a sugar-free version, omit the granulated sugar and use monk fruit sweetener instead. If you're making these for a crowd, double the recipe but use two 8-oz chocolate bars to maintain balance.
Store the finished shots in an airtight container in the fridge for up to 1 week. They thicken as they cool, so reheat gently in 10-second bursts in the microwave before serving. For a professional touch, chill small glasses in the freezer for 10 minutes before filling. The chocolate mixture can be prepped ahead and stored in the fridge for 3 days before portioning. Garnish with cocoa powder or crushed nuts right before serving to keep them fresh.
Why You'll Love This Recipe
- Three-Ingredient Magic: I swear by this recipe because it’s that simple—just melt the dark chocolate with butter, whip in cream, and a splash of vanilla. No measuring cups, no fuss, and no last-minute grocery runs. Honestly, I’ve made it while waiting for coffee to brew.
- Rich Without Effort: The dark chocolate and cocoa powder team up for a deep, velvety flavor that’s ridiculously satisfying. The heavy cream makes it luscious, not heavy, and that vanilla? It’s the secret that turns "good" into "I’ll have another."
- Party in a Cup: Between us, this is my go-to for dessert parties, last-minute gifts, or when I need to impress someone with zero effort. Pour into small jars, tie a ribbon, and boom—you’ve got a crowd-pleaser that costs pennies to make.
- No Waste, All Gain: The leftovers? They’re even better. Store them in the fridge for up to a week, and they’re perfect for topping pancakes, mixing into oatmeal, or just eating straight from the spoon. (Yes, even on a Tuesday night.)
Step-by-step instructions for chocolate shots
Here's how to craft intensely rich, velvety chocolate shots with perfect balance every time.
Melt the Dark Chocolate and Butter
Place the 4 oz high-quality dark chocolate bar and 1 tablespoon unsalted butter in a small, heatproof bowl. Position the bowl over a saucepan filled with 1 inch of simmering water, ensuring the bottom of the bowl doesn't touch the water. This double boiler method prevents scorching while gently melting the chocolate.
Stir occasionally with a silicone spatula until the chocolate and butter are completely melted and smooth, which should take about 3-4 minutes. The mixture should reach a temperature around 110°F—just warm enough to flow like thick syrup but not hot enough to burn. Remove from heat immediately once melted to preserve its rich flavor.
Incorporate the Heavy Cream and Sugar
In a separate small bowl, whisk together the ¼ cup heavy cream, 1 teaspoon granulated sugar, and ½ teaspoon vanilla extract until fully combined. The sugar helps balance the bitterness of the dark chocolate, while the vanilla adds depth. Add this mixture to the melted chocolate and butter, whisking vigorously for 1-2 minutes until the cream is fully incorporated and the mixture is smooth and glossy.
This is where the magic happens—the cream should blend seamlessly into the chocolate, creating a velvety texture. If the mixture thickens slightly, gently warm it over the double boiler for 10-15 seconds to restore its fluidity. The goal is a consistency that coats the back of a spoon but still flows freely when poured.
Add Salt and Optional Brandy or Rum
Stir in the ¼ teaspoon kosher salt and 1 teaspoon brandy or dark rum (if using) until fully dissolved. The salt enhances the chocolate's natural flavors, while the alcohol adds a subtle warmth and complexity. Taste the mixture and adjust the sugar to your preference—you want a balance of sweetness and bitterness that satisfies your palate.
At this stage, the mixture should be silky and rich, with a deep cocoa aroma. If you skipped the alcohol, the flavor will still be intense but slightly more straightforward. Let the mixture cool slightly for 1-2 minutes—it should be warm to the touch but not hot, as this ensures the shots set properly in the molds.
Pour and Set the Shots
Fill four 1-ounce shot molds or small silicone molds with the chocolate mixture, filling each about ¾ full. Tap the molds gently on the counter to remove any air bubbles, then smooth the tops with the back of a spoon. Place the molds in the refrigerator and let them set for 15-20 minutes, or until the chocolate is firm to the touch.
For a smoother finish, dust the tops with 1 tablespoon cocoa powder while still slightly warm. This not only adds a decorative touch but also prevents the chocolate from sticking to the molds when unmolding. Once fully set, the shots should hold their shape and have a glossy sheen—signs of perfectly tempered chocolate.
Serve and Enjoy Immediately
Unmold the chocolate shots by gently tapping the bottom of each mold or running a small knife around the edges. Serve them immediately on a chilled plate or directly in shot glasses for an intense cocoa experience. The texture should be firm yet melt-in-your-mouth, with a deep, complex flavor that lingers.
These shots are best enjoyed fresh, as the chocolate's texture and flavor will degrade slightly over time. Pair them with a bold espresso or a glass of dessert wine for a luxurious finish. The balance of richness, bitterness, and a hint of salt makes this recipe a standout for any chocolate lover.
Pro Tips For Making Chocolate Shot
- Temper the Chocolate: Chop that dark chocolate into tiny, even pieces—think rice-sized, not shaved snow. I learned this the hard way when my first batch turned into a greasy mess because the chocolate seized up in the cream. A sharp knife and a cutting board work best; a blender just makes a powdery disaster.
- Heat Cream Slowly: Warm the heavy cream over medium-low heat until it’s steaming but not boiling—just under 180°F (82°C). After burning the first batch, I now use a thermometer. Too hot, and the cream scalds the chocolate; too cool, and the butter won’t emulsify properly.
- Whisk Like Your Life Depends on It: Once the chocolate hits the cream, don’t just stir—whisk vigorously for 2-3 minutes until the mixture is silky smooth. I used to let it sit, thinking it would "melt together," but that’s how you end up with grainy lumps. Keep that arm moving.
- Strain for Smoothness: Skip the food processor—fine-mesh strain the finished mixture into a clean bowl. This catches any stubborn butter grains or cocoa grit, giving you that restaurant-quality velvety texture. Yes, it’s an extra step, but your shot will thank you.
Perfect pairings for chocolate shot
Espresso Pairings
These chocolate shots are a game-changer when paired with a bold espresso—the bitterness of the dark chocolate mirrors the coffee's intensity while the creaminess softens the caffeine kick. I recommend a double shot of freshly brewed espresso (about 2 ounces) served in a demitasse cup alongside the shot.
The contrast between the two creates a perfect balance of sweet, bitter, and creamy notes. For an extra touch, sprinkle finely ground cinnamon over both the chocolate shot and espresso. 💫
Dessert Wine Match
A glass of Port wine or Moscato d'Asti elevates these chocolate shots to a luxurious dessert experience. The natural sweetness of these wines complements the chocolate's richness without overpowering it.
I love serving a 2-ounce pour of Ruby Port in a small wine glass alongside the shot—its fruity notes and slight tannins enhance the cocoa's depth. For a lighter option, Prosecco adds a bubbly contrast that cuts through the richness beautifully.
Cocktail Fusion
Turn your chocolate shot into a cocktail by adding 1 ounce of vanilla vodka or Kahlúa to the mixture before setting. Serve over ice in a rocks glass with a splash of heavy cream drizzled on top.
For a boozy twist, rim the glass with crushed graham crackers and a pinch of cayenne pepper—this adds a subtle spicy-sweet contrast that pairs perfectly with the chocolate's intensity. 🍹
After-Dinner Digestif
Pair these shots with a small glass of brandy or dark rum to create a sophisticated after-dinner digestif. The alcohol's warmth enhances the chocolate's natural flavors, while the shots add a creamy, rich finish.
I recommend serving them in chilled coupe glasses with a flamed orange peel for an elegant touch. The combination is perfect for winding down after a rich meal.
Coffee Liqueur Twist
For a coffee lover’s dream pairing, mix ½ ounce of coffee liqueur (like Mr. Black or Tia Maria) into the chocolate shot mixture before setting. Serve it alongside a cortado or flat white for a double coffee-chocolate experience.
The liqueur adds a caramelized depth that bridges the gap between the chocolate and coffee flavors seamlessly. Garnish with a dusting of cocoa powder and a pinch of sea salt for a sophisticated finish.
Non-Alcoholic Pairings
Don’t skip the chocolate shots just because you’re avoiding alcohol! Pair them with chilled chamomile tea for a soothing, caffeine-free experience—the tea’s floral notes complement the chocolate’s richness. For a dessert pairing, serve alongside vanilla bean ice cream or whipped mascarpone to create a decadent chocolate trifle in shot form.
A sprinkle of toasted hazelnuts adds crunch and depth. 🌿
Nutrition facts
Frequently asked questions
Can I make these chocolate shots without alcohol?
Simply omit the brandy or rum entirely—the recipe still delivers intense cocoa flavor. For extra depth, add ½ teaspoon instant espresso powder or 1 teaspoon orange zest to the melted chocolate mixture. The cream and vanilla will carry the richness perfectly on their own.
How do I fix grainy chocolate in my shots?
Grainy texture happens when chocolate overheats or isn't melted smoothly. Fix it by whisking in 1 teaspoon vegetable oil or coconut oil while warm—this helps emulsify the mixture. For prevention, always use a double boiler and stir constantly until the chocolate reaches 110°F max. If already set, gently reheat the shots in 5-second microwave bursts until smooth.
Can I make these shots ahead of time?
Yes! Prepare the chocolate mixture up to 3 days ahead and store it in an airtight container in the fridge. When ready to serve, reheat gently in 10-second microwave bursts until pourable, then chill the molds for 15 minutes. The flavor actually improves slightly after 24 hours as the ingredients meld. For best texture, serve within 1 week of making.
What's the best way to serve these shots for a crowd?
Use mini shot glasses or silicone molds to create uniform portions. For a party setup, arrange them on a chilled tray with small spoons for scooping. Garnish with crushed pistachios or gold leaf for elegance. Serve with a dipping sauce of warmed caramel or raspberry coulis on the side. Pre-chill your serving dishes in the freezer for 10 minutes to keep the shots firm.
Why does my chocolate shot mixture separate?
Separation usually happens when the cream cools too quickly or isn't incorporated properly. Fix it by gently reheating the mixture over a double boiler while whisking constantly until smooth. For prevention, always whisk the cream and chocolate together for 2-3 minutes until fully emulsified. If using alcohol, add it gradually while whisking to help bind the mixture. The texture should be like thick pudding but still pourable.