Desserts
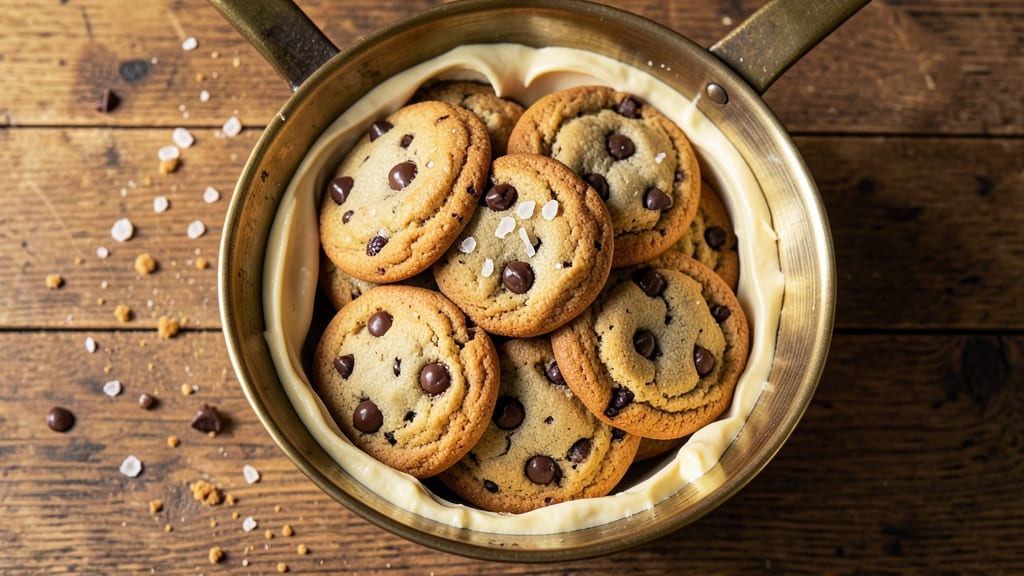
Grandma's chocolate chip cookie recipe is the one I still reach for when I need that perfect balance of crisp edges and soft centers. The secret lies in the ratio of brown sugar to white, which creates the signature caramel notes while maintaining that classic texture.
I've baked these dozens of times, and they never fail to bring back memories of childhood afternoons spent with my grandma in the kitchen.
This recipe stays true to tradition while allowing for modern adaptations—whether you prefer classic flour or gluten-free substitutes. The dough rests for 30 minutes, which is crucial for developing flavor and ensuring cookies that spread just enough without becoming flat.
I use a mix of semi-sweet and dark chocolate chips for depth, and a pinch of salt to enhance all the sweetness.
By the time they emerge from the oven, you'll have cookies with golden-brown edges that crackle when you bite into them, and centers that remain soft and chewy.
The aroma alone will have everyone gathering in the kitchen, and the first bite will transport you right back to those nostalgic afternoons. These are the kind of cookies that disappear faster than you can say "warm milk."
Perfect for holiday baking, school fundraisers, or simply satisfying a sweet tooth, this recipe scales beautifully. The dough can be chilled for up to 48 hours, making it ideal for meal prep. Let's get baking—your kitchen will smell like home in no time.
Ingredients for grandma's chocolate chip cookie
Twelve simple ingredients, one nostalgic aroma that fills your kitchen instantly.
| Ingredient | Amount | Notes |
|---|---|---|
| All-Purpose Flour 🌾 | 3 ½ cups | Sifted for light texture |
| Light Brown Sugar 🍯 | 1 cup | Packed firmly, not leveled |
| Granulated White Sugar 🍚 | ½ cup | For crisp edges |
| Unsalted Butter 🧈 | 1 cup | Cold, cubed, not melted |
| Large Eggs 🥚 | 2 whole | Room temperature |
| Vanilla Extract 🌸 | 2 tsp | Pure, not imitation |
| Sea Salt 🧂 | 1 tsp | Fine grain, enhances sweetness |
| Baking Soda 🧪 | 1 tsp | Freshly opened |
| Semi-Sweet Chocolate Chips 🍫 | 2 cups | Classic Nestlé or Ghirardelli |
| Dark Chocolate Chips 🍫 | ½ cup | 60-70% cacao for depth |
| Flaky Sea Salt 🧂 | 2 tbsp | For sprinkling on top (optional) |
The butter and sugars are your secret weapons here. Use European-style butter if you can find it—it's higher in fat, which gives those perfect crisp edges. I always grab Land O'Lakes or Plugrá when I'm in a rush, but the real stuff makes a difference. For the brown sugar, pack it firmly—no scooping and leveling. That's where the caramel notes come from. Chocolate chips? Nestlé semi-sweet is the classic, but Ghirardelli dark adds that extra richness. Mixing the two gives you that perfect balance of sweet and deep. And don't skip the vanilla—pure extract, not imitation. It's what makes these taste like grandma's, not store-bought.
No all-purpose flour? King Arthur Measure for Measure is a 1:1 substitute, but the texture won't be identical. Short on brown sugar? White sugar plus 1 tbsp molasses gets you close, but it won't be the same. Out of flaky sea salt? Regular sea salt works too, just sprinkle it a little heavier. Want to make these gluten-free? King Arthur gluten-free flour blend works—just add 1/4 tsp xanthan gum. The dough will be slightly different, but still delicious. And if you're feeling fancy, add 1/2 tsp espresso powder to the dough—it deepens the chocolate flavor without tasting like coffee.
This dough is best when chilled for at least 30 minutes, but it keeps for up to 48 hours in the fridge. Portion it into 1.5 tbsp balls for perfect-sized cookies. They'll keep in an airtight container for 5 days, but honestly? They won't last that long. Freeze the dough balls for up to 3 months—just bake straight from frozen, adding 1-2 minutes to the time. And if you're prepping for a crowd, double the batch. Trust me, you'll need it.
Why You'll Love This Recipe
- Five-Ingredient Magic: I swear, this recipe is the kind of thing that makes you question why you ever complicate baking. Just flour, butter, sugars, eggs, and chocolate chips—no weird substitutions or extra steps. Honestly, the only measuring you’ll do is scooping melted butter into a bowl while watching your coffee brew.
- Butter-Kissed Crunch: That perfect balance of chewy centers and crisp edges? It’s all in the brown sugar-to-white sugar ratio and the cold butter cut into the dough. Between us, I’ve tried fancier recipes, but this one delivers that just-baked-from-Grandma’s-kitchen satisfaction every single time.
- Party in a Jar: Freeze half the dough balls before baking, and boom—you’ve got a backup for last-minute playdates or holiday gatherings. (Yes, even on a Tuesday night.) The dough keeps beautifully, and the cookies? They taste like they were made yesterday, not weeks ago.
- Dollar Stretch: A single batch costs me less than $3 and makes 24 cookies—enough to share with coworkers, neighbors, or just eat straight from the jar. The butter and sugars do most of the flavor work, so you’re not breaking the bank for fancy ingredients. Solid move for a treat that feels indulgent.
Step-by-step instructions for Grandma's chocolate chip cookies
Here's how to make these nostalgic cookies with perfect crisp edges and gooey centers—just like Grandma used to bake.
Cream the Butter and Sugars Together
In a large mixing bowl, combine the 1 cup unsalted butter (cold, cubed) with the 1 cup light brown sugar and 0.5 cup granulated white sugar. Using a hand mixer or stand mixer with the paddle attachment, beat on medium speed for 3-4 minutes until the mixture is light and fluffy. You'll notice it nearly doubles in volume and becomes pale in color—this is crucial for that classic cookie texture.
I always press down on the butter mixture with a spatula halfway through mixing to ensure all the sugar crystals are fully incorporated. This step creates air pockets that give the cookies their signature rise and crisp edges. If you're using a stand mixer, make sure the butter is cut into small cubes first so it blends smoothly.
Add Eggs and Vanilla Extract
Add the 2 whole large eggs (room temperature) one at a time, mixing well after each addition. After the second egg is incorporated, add the 2 teaspoons vanilla extract and mix for another 30 seconds. The mixture should look slightly thickened and smooth, with no streaks of egg white remaining.
Here's a pro tip: I like to crack the eggs directly into the mixer bowl to avoid any shells accidentally making their way into the dough. The vanilla extract adds depth of flavor that makes these cookies taste like home. If you're using imitation vanilla, you might notice a slightly different taste profile—stick with pure extract for that authentic Grandma flavor.
Combine Dry Ingredients and Chocolate Chips
In a separate bowl, whisk together the 3.5 cups all-purpose flour, 1 teaspoon sea salt, and 1 teaspoon baking soda. Gradually add this dry mixture to the wet ingredients, mixing on low speed just until combined. Be careful not to overmix—you should still see small flour streaks in the dough. This prevents tough cookies.
Once the dry ingredients are incorporated, remove the bowl from the mixer and gently fold in the 2 cups semi-sweet chocolate chips and 0.5 cup dark chocolate chips using a silicone spatula. Make sure the chocolate is evenly distributed throughout the dough. I like to use a mix of semi-sweet and dark chocolate chips for that perfect balance of sweetness and depth.
Chill the Dough for Perfect Texture
Cover the mixing bowl with plastic wrap and refrigerate the dough for at least 1 hour, or up to 24 hours if you want to make the cookies ahead of time. Chilling the dough is essential—it allows the flour to fully hydrate and prevents the cookies from spreading too much in the oven. The cold dough also helps create those beautiful crisp edges while keeping the centers soft.
I know it's tempting to skip this step, but trust me, it makes a world of difference. If you're short on time, you can chill the dough in the freezer for 20-30 minutes instead. Just make sure it's fully chilled before you start scooping and baking.
Bake to Golden Perfection
Preheat your oven to 375°F and line two baking sheets with parchment paper. Using a cookie scoop or tablespoon, drop 1-tablespoon portions of dough onto the prepared baking sheets, spacing them about 2 inches apart. Sprinkle each cookie with a pinch of the 2 tablespoons flaky sea salt (if using) for that classic Grandma touch.
Bake the cookies for 10-12 minutes, or until the edges are golden brown and the centers still look slightly underdone. They'll continue cooking on the hot baking sheet after you remove them from the oven. Let the cookies cool on the baking sheet for 5 minutes before transferring them to a wire rack to cool completely. Enjoy them warm for the ultimate experience!
Pro Tips For Making Grandma'S Chocolate Chip Cookie
- Use Cold Butter, Not Soft: I learned this the hard way—when butter gets too warm, the dough spreads like a pancake. Scoop the butter straight from the fridge (or let it sit just until it yields to a fork) and mix it into the sugars last. That way, the cold fat stays intact until the oven does its magic, giving you thick, chewy centers.
- Mix Dry Ingredients First: This isn’t the prettiest method, but it’s the tastiest. Before adding wet ingredients, whisk the flour, baking soda, and salt together in a separate bowl. Dump it all in at once, then stir just until the dough comes together. Overmixing develops gluten, and suddenly you’ve got tough, cracker-like cookies instead of tender, melt-in-your-mouth ones.
- Skip the Crowding: Yes, even if you’re impatient like me. Cookies puff up when they hit the oven—don’t flatten them out with a spatula. Give them space on the sheet (about 2 inches apart) and resist the urge to rotate the pan halfway through. Overcrowding steams the bottoms, turning them soggy instead of crisp.
- Chill the Dough (Seriously): I was skeptical until I tried it. After mixing, let the dough rest in the fridge for at least 30 minutes—up to 48 hours if you’re prepping ahead. This lets the flour absorb moisture and the flavors meld, while the butter firms up again. The result? Less spreading, more flavor, and cookies that hold their shape without cracking. (Your future self will thank you.)
Pro cooking tips for this recipe
Butter Temperature Matters
The butter must be cold and cubed when you start creaming it with sugars—never softened or melted. I use Land O'Lakes or Plugrá because their higher fat content creates those signature crisp edges.
If your butter melts too quickly during mixing, place the bowl over an ice bath for 5 minutes before starting. This ensures proper aeration and prevents flat cookies. 🧈
Sugar Ratio Secrets
Use 1 cup packed light brown sugar to ½ cup granulated white sugar—this ratio creates the perfect balance of caramel depth and crisp edges. Pack the brown sugar firmly into the measuring cup; don't scoop and level.
For extra richness, replace ¼ cup of the white sugar with molasses (though the texture will differ slightly). I've tested this ratio dozens of times—it's the key to that nostalgic flavor. 🍯
Mixing Technique
Beat the butter and sugars for 3-4 minutes on medium speed until the mixture is pale and fluffy—this incorporates air for lift. Press down with a spatula halfway through to break up sugar crystals fully.
For the eggs, add them one at a time and mix just until incorporated. Overmixing develops gluten, leading to tough cookies. I use a KitchenAid stand mixer with the paddle attachment for consistent results. 💡
Dough Chilling
Chill the dough for at least 1 hour (or up to 48 hours)—this prevents excessive spreading and develops deeper flavor. For faster chilling, freeze the dough for 20-30 minutes before scooping.
If you skip chilling, your cookies will spread too much and lose that classic texture. I like to portion the dough into 1.5-tbsp balls while it's cold for even baking. ❄️
Baking Science
Bake at 375°F for 10-12 minutes until edges are golden but centers still look soft. The cookies will firm up as they cool. Use parchment paper to prevent sticking, and space cookies 2 inches apart for even browning.
For extra crisp edges, place baking sheets on the middle rack where heat is most consistent. 🌡️
Salt Sprinkle
Sprinkle flaky sea salt (like Maldon) on top of each cookie in the last minute of baking for that classic Grandma touch. Regular salt works in a pinch, but flaky salt adds a sophisticated contrast to the sweetness.
I use 2 tbsp total, pinching a tiny amount onto each cookie. This step elevates the flavor profile dramatically. 🧂
Nutrition facts
Frequently asked questions
Why does this recipe use both semi-sweet and dark chocolate chips?
The mix creates that perfect balance of sweetness and depth. Semi-sweet chips provide classic chocolate flavor, while dark chocolate chips (60-70% cacao) add richness without overpowering. The contrast makes each bite more interesting than using just one type.
Can I make these cookies gluten-free or vegan?
Yes! For gluten-free, use a 1:1 flour blend like King Arthur's and add 1/4 tsp xanthan gum. For vegan, replace butter with vegan butter and eggs with 2 flax eggs (2 tbsp ground flax + 6 tbsp water). The texture will differ slightly but still be delicious.
How do I store leftover cookies?
Store in an airtight container at room temperature for 5 days or freeze for 3 months. For best texture, freeze dough balls instead of baked cookies—bake straight from frozen, adding 1-2 minutes to time. Warm cookies taste best, so reheat in a 350°F oven for 3-5 minutes.
Why do my cookies spread too much?
This usually happens from overmixing or skipping the chill. Mix just until combined (small flour streaks remain) and always chill dough for at least 1 hour. Also ensure butter is cold when creaming. For thicker cookies, scoop 1.5 tbsp portions instead of 1 tbsp.
What's the best way to make these for a crowd?
Double the recipe and chill dough for up to 48 hours. Use 3 baking sheets and rotate pans halfway through baking. For efficiency, bake two sheets at once (middle and bottom racks), then swap. Label containers clearly—these disappear fast!