Desserts
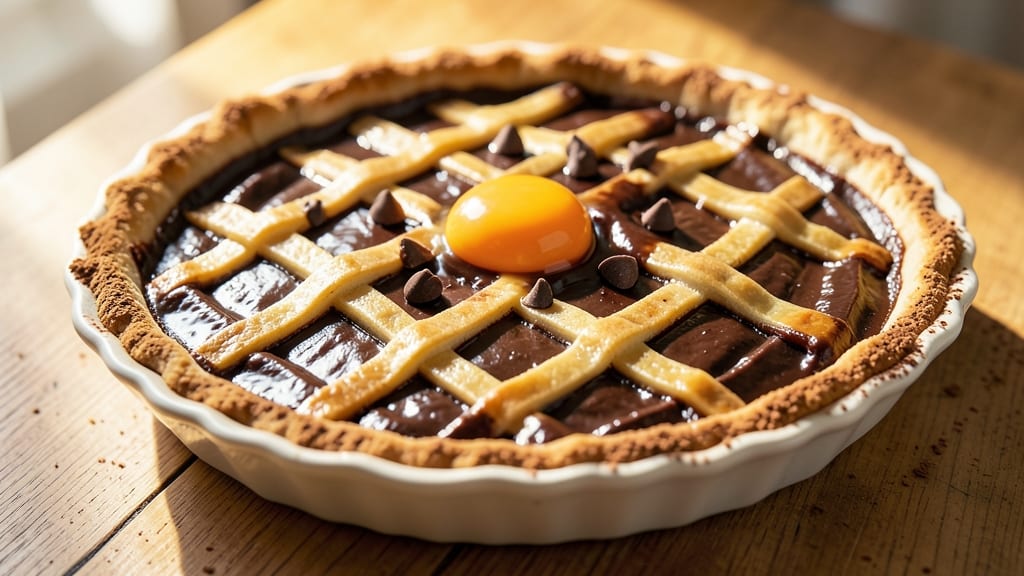
My grandmother's chocolate pie recipe carries the warmth of Sunday afternoons and the rich, velvety texture that made it a centerpiece at every family gathering.
This isn't just dessert—it's a tradition passed down through generations, with a fudge crust that cracks perfectly and a filling so smooth it melts in your mouth. The secret lies in tempering the chocolate properly and baking it just until the center jiggles slightly, ensuring that signature homemade perfection.
What sets this recipe apart is the balance between simplicity and technique—no fancy ingredients, just quality chocolate, butter, and a touch of corn syrup for that signature crack.
The crust requires a blind-baking step to prevent sogginess, while the filling relies on precise timing to achieve that luscious, custard-like consistency without curdling. Every bite delivers that nostalgic flavor of childhood, wrapped in a crust that's both sturdy and delicate.
By the time you pull this pie from the oven, your kitchen will smell like memories, and the sight of that golden crust with its signature crack will make it impossible to wait.
The filling will be rich yet velvety, with a slight wobble in the center that disappears after just a few minutes of resting. This is the kind of dessert that turns ordinary gatherings into special occasions, and the kind that gets passed down through families.
Serve it warm with a scoop of vanilla ice cream or let it cool slightly for clean slices—either way, it's a guaranteed crowd-pleaser. The recipe yields an 8-inch pie, perfect for sharing, and the leftovers?
They'll disappear just as quickly as the first slice. Here's how to recreate this timeless family favorite in your own kitchen.
Ingredients for grandmother's chocolate pie
Twelve ingredients, one timeless dessert—this is the heart of family gatherings.
| Ingredient | Amount | Notes |
|---|---|---|
| Semisweet Chocolate Chips 🍫 | 12 oz | High-quality, 60% cocoa minimum |
| Unsalted Butter 🧈 | 1 cup | Cold, cubed for crust |
| All-Purpose Flour 🌾 | 1 ½ cups | Sifted, for fudge crust |
| Granulated Sugar 🍚 | ¾ cup | Fine grain preferred |
| Light Corn Syrup 🍯 | ¼ cup | For signature crack |
| Large Eggs 🥚 | 2 whole | Room temperature |
| Heavy Cream 🥛 | 1 cup | Full-fat for richness |
| Whole Milk 🥛 | ½ cup | Warmed for smooth filling |
| Vanilla Extract 🍋 | 2 tsp | Pure Madagascar preferred |
| Diamond Crystal Kosher Salt 🧂 | ½ tsp | Fine grain for balance |
| Cornstarch 🌾 | 2 tbsp | For thickening filling |
| Pie Crust Shield 🍰 | 1 piece | For blind-baking crust |
The chocolate matters most here. Ghirardelli or Guittard chips deliver that velvety melt, but Hershey's Special Dark works in a pinch. For the crust, European-style butter (like Plugrá) creates a flakier texture—worth the splurge if you're baking for company. Corn syrup is non-negotiable; Karo is the gold standard for that signature crack. Measure your flour precisely—spoon and level method ensures consistency. The pie dish? A 9-inch glass pie plate prevents burning, and parchment paper under the crust eliminates sticking.
No corn syrup? Honey or maple syrup at half the amount works, though the crack won't be as dramatic. Substituting heavy cream for milk? Use 1 cup total (reduce milk to 0.25 cup). The filling thickens differently with cornstarch—arrowroot powder is a 1:1 swap. For a gluten-free version, replace flour with 1 cup almond flour (add 0.5 tsp xanthan gum). The crust can be pre-made; Pillsbury works, but homemade delivers that nostalgic crunch. Temperature is key: room-temperature eggs blend smoothly, while cold butter ensures flaky layers.
This pie keeps beautifully—3 days at room temperature in an airtight container, or 5 days refrigerated. For long-term storage, wrap tightly in plastic wrap, then foil, and freeze for up to 3 months. Thaw overnight in the fridge. The crust reheats well—5 minutes at 350°F restores its crispness. Serve warm with vanilla bean ice cream (or store-bought if short on time) for that grandma-approved touch. Leftovers? Portion into single slices—they won’t last past tomorrow anyway.
Why You'll Love This Recipe
- No-Fuss Filling: I swear by the corn syrup trick—it keeps that filling silky smooth without extra fuss. Just melt the butter, toss in the chocolate chips and sugar, then stir in that syrup until it’s glossy. Honestly, the hardest part is waiting for it to set.
- Rich Without Guilt: That semisweet chocolate and butter combo? It’s decadent but not overpowering. The flour gives it just enough structure so it’s not a puddle—more like a hug in pie form. (Yes, even on a Tuesday night.)
- Leftovers That Last: This pie holds up for days in the fridge, and it actually tastes better the second time around. Slice it up for breakfast pastries or pack it for lunch—no one will guess it’s been sitting there.
- Budget-Friendly Luxury: Five ingredients, all pantry staples. No fancy chocolate bars or specialty syrups—just what you’ve got. My grandmother made this for holidays and weeknights because it’s that good without breaking the bank.
Step-by-step instructions for grandmother's chocolate pie recipe
This classic homestyle pie delivers a signature fudge crust and velvety filling with a signature crack—every layer crafted with precision.
Prepare the Fudge Crust
In a heavy-bottomed saucepan, combine the 1 cup unsalted butter, 0.75 cup granulated sugar, 0.25 cup light corn syrup, and 0.5 tsp diamond crystal kosher salt. Bring to a boil over medium-high heat, stirring constantly until the mixture reaches 238°F on a candy thermometer. This takes about 8-10 minutes—watch closely as it thickens dramatically.
Remove from heat and immediately add the 12 oz semisweet chocolate chips, stirring until fully melted and smooth. Let the mixture cool slightly for 2-3 minutes before pouring into a 9-inch pie dish. Use a rubber spatula to spread evenly, creating a thin, even layer. Sprinkle the 1.5 cups all-purpose flour evenly over the chocolate mixture, pressing lightly to adhere. Chill in the refrigerator for at least 1 hour to set completely.
Blind-Bake the Crust
Preheat your oven to 350°F. Line the chilled crust with the pie crust shield and place a baking sheet on top to create even pressure. Bake for 12-15 minutes until the edges are set and the center is firm. Remove the shield and baking sheet, then bake for an additional 5-7 minutes until the crust is fully dry. This step prevents a soggy crust when adding the filling later.
Here's the thing—don't skip the shield. Without it, the crust will puff unevenly and may crack. The goal is a sturdy base that holds up to the rich filling without crumbling.
Prepare the Velvety Filling
In a medium saucepan, warm the 0.5 cup whole milk over low heat until steaming. In a separate bowl, whisk together the 2 whole large eggs, 1 cup heavy cream, 2 tsp vanilla extract, and 2 tbsp cornstarch until smooth. Slowly pour the warm milk into the egg mixture while whisking constantly to temper the eggs and prevent scrambling.
Return the mixture to the saucepan and cook over medium heat, stirring constantly with a wooden spoon, until it thickens to a pudding-like consistency. This takes about 5-7 minutes—you're looking for a sauce that coats the back of a spoon and leaves a clean trail when you run your finger through it. Remove from heat immediately once thickened, as it will continue to set slightly as it cools.
Assemble and Set the Pie
Pour the warm filling into the pre-baked crust, spreading it evenly with a spatula. The filling should reach just below the top edge of the crust. Place the pie on a baking sheet to catch any potential drips and refrigerate for at least 4 hours, or until fully set. This long chilling time is crucial—it allows the filling to develop its signature crack and achieve that perfect velvety texture.
Real talk: If you're impatient, you can speed this up by placing the pie in the freezer for 2 hours, but the flavor and texture won't be as refined. Patience here makes all the difference in the final result.
Serve with Confidence
Once fully set, slice the pie with a hot, clean knife for clean edges. The filling should have a characteristic crack on top—a sign of proper cooling—and be rich, velvety, and deeply chocolatey. Serve at room temperature for the best texture contrast between the crisp crust and smooth filling.
This pie keeps well in the refrigerator for up to 5 days, though I've found it's best enjoyed within 24 hours when the flavors are at their peak. Store any leftovers covered tightly to maintain freshness.
Pro Tips For Making Grandmother'S Chocolate Pie
- MELT CHOCOLATE LOW AND SLOW: I learned this the hard way—dumping chocolate chips into boiling sugar syrup turns them into greasy clumps. Instead, lower the heat to a bare simmer (just tiny bubbles breaking the surface) and stir constantly until the chips disappear. If your mixture looks like soup, you’ve gone too fast.
- SIFT THE FLOUR FIRST: That flour clump in your filling is the enemy. Sift it into the butter-sugar mix before adding wet ingredients—it blends smoother and cuts down on lumps. (Yes, even if you’re impatient like me, resist the urge to eyeball it.)
- DON’T OVERBAKE THE CRUST: The crust should be golden, not browned like a cracker. After 15 minutes, cover the edges with foil and check every 5 minutes. Overbaking turns it tough—your pie’s texture depends on this.
- CHILL THE FILLING 30 MINUTES: Sounds weird, but it works: Let the chocolate mixture cool to room temp before pouring. It thickens properly and won’t sink to the bottom of the crust, leaving you with a clean slice. (Your future self will thank you.)
Storing and reheating this grandmother's chocolate pie
Room-Temp Storage
This pie shines when served at room temperature, so I recommend bringing it out of the fridge 30-60 minutes before serving. The contrast between the crisp, cool crust and the velvety filling is what makes it magical.
I like to place the pie on a wire rack in my kitchen so air circulates evenly—this prevents condensation from making the crust soggy. If you're short on time, a 10-minute warm-up in a 350°F oven restores that perfect texture. 💫
Refrigerator Magic
Your pie will keep beautifully in the fridge for up to 5 days if stored properly. I always use a pie carrier (like the OXO Good Grips model) to protect the edges, then wrap the whole thing tightly in plastic wrap followed by aluminum foil.
This double-layer approach prevents the filling from absorbing fridge odors and keeps the crust crisp. When ready to serve, let it sit at room temperature for 1 hour—this is non-negotiable for the best texture.
Freezer Preservation
For long-term storage, this pie freezes like a dream. After the pie is fully set (but before slicing), wrap it tightly in heavy-duty plastic wrap, then place it in a freezer bag with all the air squeezed out. Label with the date—it'll keep for up to 3 months.
When ready to serve, thaw overnight in the fridge. For a quick fix, place the frozen pie on a baking sheet and warm in a 300°F oven for 30-40 minutes until the center is just thawed. The texture will be slightly softer than fresh, but still delicious.
Reheating Secrets
Leftovers deserve special treatment. To restore that perfect texture, I recommend reheating individual slices in a skillet over medium heat for 2-3 minutes per side. The residual heat from the pan helps crisp up the crust edges while keeping the filling warm.
For a more even approach, place slices on a baking sheet and warm in a 325°F oven for 8-10 minutes. Always cover loosely with foil to prevent over-browning. The key is low and slow—never rush reheating or you'll end up with a dry filling. 🔥
Microwave Shortcut
When time is tight, the microwave works surprisingly well for single slices. Place a piece on a microwave-safe plate and cover with a damp paper towel to prevent drying. Heat on 50% power for 20-30 seconds, then check the filling temperature—it should reach 165°F for safety.
If the crust feels too soft, pop it under the broiler for 10 seconds to crisp up. This method takes about 1 minute total and preserves most of the pie's magic.
Serving Leftovers
I've found that pie slices reheat best when stored in individual portions—this prevents the filling from becoming watery when reheated. For a restaurant-style presentation, dust slices with powdered sugar or add a dollop of whipped cream before serving.
The pie's rich chocolate flavor pairs perfectly with a cup of hot coffee or chilled milk—both help cleanse the palate between bites. And if you're feeling fancy, a sprinkle of crushed peppermint adds a refreshing contrast to the deep chocolate notes. 💛
Nutrition facts
Frequently asked questions
Why does my chocolate pie crust crack?
The signature crack happens when the filling cools properly—it's not a mistake! The corn syrup in the crust and the custard filling shrink at different rates, creating that beautiful pattern. For a more pronounced crack, ensure the pie cools completely at room temperature (not in the fridge) for 4-6 hours.
Can I make this pie without corn syrup?
Yes, but the crust won't crack as dramatically. Substitute with 2 tbsp honey or maple syrup (reduce other liquids by 1 tbsp to maintain balance). For the filling, use 3 tbsp cornstarch instead of 2 tbsp if omitting corn syrup entirely—this prevents a runny texture. The flavor will still be rich, just slightly less traditional.
How do I fix a soggy crust?
Prevent sogginess by blind-baking the crust for 15-20 minutes before adding filling (use pie weights or dried beans). If it's already soggy, place the pie on a baking sheet and bake at 350°F for 10-12 minutes—this crisps the edges without overcooking the filling. For future pies, chill the assembled pie for 2 hours before slicing to let the filling set fully.
What's the best way to slice this pie?
Use a hot, clean knife dipped in hot water between slices. Warm the knife by running it under hot water for 10 seconds, then wipe dry before cutting. This prevents the filling from sticking and gives you clean, professional-looking slices. For extra flair, dust with powdered sugar or add a dollop of whipped cream.
Can I make this pie gluten-free?
Replace the all-purpose flour in the crust with 1 cup almond flour plus 0.5 tsp xanthan gum. For the filling, use 3 tbsp cornstarch (gluten-free) instead of flour. The texture will be slightly denser, but the rich chocolate flavor remains unchanged. Test the crust's firmness during blind-baking—it may need 2-3 extra minutes to set properly.