Desserts
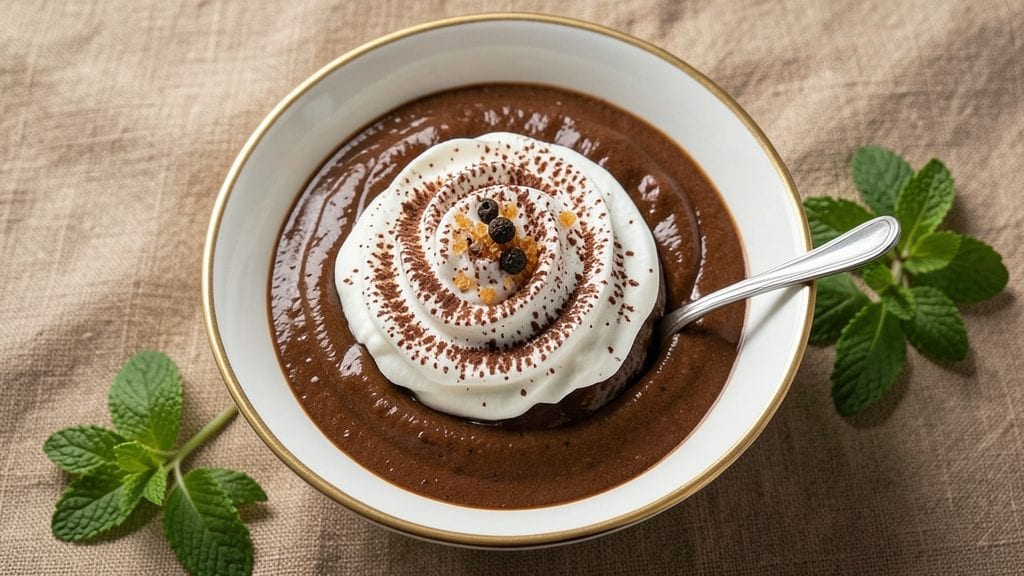
This old-fashioned chocolate pudding recipe delivers the rich, velvety texture that makes it a timeless dessert favorite. The secret lies in precise ratios of cocoa, sugar, and eggs—whisked to perfection before baking in a water bath for that signature silky depth.
I remember making this exact version as a child, and it’s the one my family still requests today.
The traditional method uses simple ingredients you likely already have: flour, sugar, cocoa powder, milk, eggs, and butter. What sets this apart is the slow baking process, which creates a pudding that’s neither too firm nor too runny—just right.
The optional toasted marshmallow topping adds a caramelized contrast that elevates it from classic to extraordinary.
By the time you’re ready to serve, you’ll have a dessert that’s smooth, rich, and perfectly set—ideal for special occasions or a comforting treat. The pudding holds its shape when chilled, making it easy to slice and serve with whipped cream or chocolate shavings.
This is dessert at its most satisfying, with every bite delivering that nostalgic chocolate flavor.
Perfect for holiday gatherings, dinner parties, or a quiet night in, this recipe scales effortlessly. The key is patience—letting it bake and cool properly ensures that silky, melt-in-your-mouth texture. Once you try it, you’ll understand why this version has stood the test of time.
Ingredients for old fashioned chocolate pudding
Six simple ingredients transform into nostalgic chocolate pudding with a toasted marshmallow crown.
| Ingredient | Amount | Notes |
|---|---|---|
| All-Purpose Flour 🌾 | ½ cup | Sifted for smooth batter |
| Granulated Sugar 🍚 | 1 cup | White or light brown |
| Unsweetened Cocoa Powder 🍫 | ½ cup | Natural or Dutch-processed |
| Large Eggs 🥚 | 4 whole | Room temperature preferred |
| Whole Milk 🥛 | 2 cups | Full-fat for creaminess |
| Unsalted Butter 🧈 | ½ cup | Cold, cubed for baking |
| Vanilla Extract 🌿 | 1 tbsp | Pure, high-quality preferred |
| Salt 🧂 | ¼ tsp | Fine sea salt |
| Miniature Marshmallows 🍬 | 1 ½ cups | For toasted topping |
| Cream Cheese 🧀 | 4 oz | Room temperature for spreading |
The cocoa powder makes all the difference here. Hershey's Special Dark or Valrhona are my go-tos—both deliver that deep, velvety flavor. If you're using Dutch-processed, add a pinch of baking soda to the batter for balance. The flour should be sifted to avoid lumps, and I always measure it by spooning into the cup and leveling off. Eggs? Room temperature makes them easier to whisk. The butter? Cold cubes melt just enough to create pockets of richness without turning greasy. For the marshmallows, Kraft Jet-Puffed are the classic choice, but any mini marshmallows work.
No cocoa powder? Melted dark chocolate (70% or higher) at half the amount gets you close, but the texture won't be identical. Short on eggs? Add 1 tbsp cornstarch per egg replaced to thicken the pudding. The vanilla extract can be swapped for vanilla bean paste if you're feeling fancy. For the marshmallow topping, if you can't find mini marshmallows, chop regular marshmallows into small pieces. The cream cheese adds a tangy contrast—Philadelphia brand is my go-to, but any soft cream cheese works. Want extra richness? Add a splash of heavy cream to the milk.
This pudding tastes even better the next day, so make it ahead if you can. Store it in an airtight container in the fridge for up to 5 days. The marshmallow topping? Toast it fresh before serving—it won't keep well once caramelized. For serving, I like to dust with powdered sugar or add a drizzle of melted chocolate. If you're making this for a crowd, double the recipe—it scales perfectly. Just remember, patience is key. The slow baking process is what creates that signature silky texture.
Why You'll Love This Recipe
- No Special Tools: Just a whisk and a saucepan—no mixer, no fancy gadgets. I stir the cocoa powder into the warm milk until it’s silky smooth, then let the eggs and sugar do the work. That’s it. Honestly, I’ve made this on a camping stove with a spoon.
- Rich Without Guilt: The cocoa powder and whole milk give it that velvety, old-school chocolate flavor—deep but not overpowering. It’s the kind of dessert that feels indulgent but only costs pennies per serving. (Yes, even on a Tuesday night.)
- Leftovers That Last: This pudding actually tastes better the next day when the flavors meld. I’ll make a big batch on Sunday, pop it in jars, and have a no-fuss treat ready for the week. Kids beg for it at school lunches, too.
- Classic Crowd-Pleaser: Birthday parties, potlucks, or just a quiet night in—this one never disappoints. The flour and eggs give it that perfect, jiggly texture, and the sugar keeps it sweet without being cloying. (Between us, it’s my go-to for when I don’t want to bake.)
Step-by-step instructions for old fashioned chocolate pudding
This classic recipe delivers velvety chocolate pudding with a toasted marshmallow crown—rich, creamy, and nostalgic all at once.
Melt Butter and Mix Wet Ingredients
In a medium saucepan, melt the 0.5 cup unsalted butter over medium-low heat until completely liquid. Remove from heat and let cool slightly—you want it warm to the touch but not hot. In a separate large bowl, whisk together the 4 whole large eggs, 1 cup granulated sugar, 0.5 cup unsweetened cocoa powder, and 0.25 teaspoon salt until smooth and fully combined.
Slowly pour the melted butter into the egg mixture while whisking constantly. This prevents scrambling the eggs from the heat. Add the 2 cups whole milk and 1 tablespoon vanilla extract, whisking until everything is perfectly blended. The mixture should be thick and glossy—this is your base pudding batter. Here's the thing—don't rush this step. Each whisk stroke ensures no lumps remain, which is key for that silky texture we're after.
Cook the Pudding Mixture
Return the bowl to the saucepan (place it directly over the heat source) and cook over medium-low heat, stirring constantly with a wooden spoon or silicone spatula. You'll notice the mixture thickens gradually—this usually takes about 8-10 minutes. The pudding is ready when it coats the back of the spoon and leaves a distinct track when you run your finger through it.
I like to test the consistency by dipping a clean spoon into the mixture and lifting it vertically. If it holds its shape and doesn't immediately drip back into the pan, it's done. Remove from heat immediately to prevent overcooking, which can make the pudding grainy. Transfer the hot pudding to serving dishes and let it cool to room temperature—this allows the flavors to meld beautifully.
Prepare the Toasted Marshmallow Topping
While the pudding cools, prepare the marshmallow topping. In a small saucepan, melt the 4 ounces cream cheese over low heat until completely smooth. Remove from heat and let cool slightly—it should be soft enough to spread but not runny. Spread this cream cheese mixture evenly over the cooled pudding layer, creating a smooth base for the marshmallows.
Preheat your broiler to high. Arrange the 1.5 cups miniature marshmallows evenly over the cream cheese layer. Place the pudding dishes on a baking sheet and broil for 1-2 minutes, watching closely. You want the marshmallows to turn golden brown and slightly puffed—this is where they develop that caramelized flavor. Be careful not to burn them; they toast quickly. Remove immediately when they're golden on top.
Chill and Serve
Let the pudding cool completely at room temperature, then refrigerate for at least 4 hours or overnight. This chilling step is crucial—it allows the pudding to set properly and develop its signature firm yet creamy texture. When ready to serve, run a knife around the edges to loosen if needed, then invert onto plates for an impressive presentation.
The finished pudding should have a glossy, dark chocolate layer with a crown of toasted marshmallows that have slightly crisp edges. Each bite delivers that perfect balance of rich chocolate, creamy texture, and sweet marshmallow contrast. Serve with whipped cream or fresh berries if you like, but honestly, this classic combination stands beautifully on its own.
Pro Tips For Making Old Fashioned Chocolate Pudding
- Whisk Eggs Cold: Grab those eggs straight from the fridge—room temperature eggs make the pudding grainy, and this isn’t a smoothie. I learned this the hard way when my first batch turned out like chocolate lumpy pudding soup. Beat them vigorous for 2-3 minutes until the yolks lighten and the mixture is thick enough to hold a faint ribbon when you lift the whisk.
- Sift That Cocoa: Unsweetened cocoa powder is not all fine powder—it’s got clumps. Sift it through a fine-mesh sieve into the dry ingredients before adding anything else. Skipping this means you’ll taste grit in every bite, and nobody wants that. Trust me, the extra 30 seconds saves you from disappointment.
- Temper the Milk: Warm the milk to just below simmering—170°F or until a thermometer reads it’s hot but not boiling. Pour it into the egg mixture slowly while whisking like your life depends on it. Cold milk shocks the eggs and curdles the pudding faster than you can say “oops.” I’ve done it; you don’t want to either.
- Chill Before Serving: Let the pudding sit at room temp for at least 15 minutes after cooking—this isn’t a race. Then refrigerate it for at least 4 hours (overnight is ideal). Rushing this step gives you a pudding that’s too thin or weirdly warm. Patience here = the creamy, set texture you’re craving. No shortcuts.
Essential equipment for old fashioned chocolate pudding
Mixing Essentials
You’ll need a large mixing bowl—I prefer stainless steel or glass for even heat distribution during cooking. A whisk (like the OXO Good Grips) is non-negotiable for achieving that silky texture, as it incorporates air and eliminates lumps.
For measuring, a set of dry measuring cups (like Pyrex) ensures accuracy, especially with the flour and cocoa powder. 🥄
Heat Control Tools
A medium saucepan with sloped sides (such as All-Clad) prevents spills when stirring the pudding mixture. Temperature control is key—use a kitchen thermometer (like Thermoworks) to monitor the butter’s heat (160°F max) before mixing.
For the broiler step, a baking sheet with edges (like Wilton) keeps your pudding dishes stable under the broiler. 🔥
Serving and Chilling
Individual ramekins (like Corelle) or a glass baking dish (such as Pyrex) are perfect for baking and serving. For chilling, a large airtight container (like Rubbermaid) keeps the pudding fresh for up to 5 days.
A spatula (preferably silicone) helps transfer the hot pudding to dishes without splashing. 🧊
Optional Extras
If you’re adding the toasted marshmallow topping, a small saucepan (like Calphalon) melts the cream cheese evenly. A fine-mesh sieve (such as OXO) strains any lumps from the melted cream cheese for a smoother finish.
For presentation, powdered sugar (sifted through a mesh strainer) adds a dusting of elegance. ✨
Budget-Friendly Swaps
No need for high-end tools—use a stainless steel bowl instead of glass, and a wooden spoon works fine for stirring. A microwave-safe bowl can replace the saucepan if you’re melting butter quickly.
For broiling, a cookie sheet with sides does the trick. The key is consistency, not cost—focus on clean, heat-safe tools. 💰
Nutrition facts
Frequently asked questions
Why does this pudding need to be baked in a water bath?
The water bath creates a gentle, even heat that prevents the eggs from scrambling while allowing the pudding to set perfectly. This method ensures a silky texture without graininess, which is key for that classic old-fashioned richness. Think of it as a slow-cooking process that develops the pudding's signature depth of flavor.
Can I make this pudding without eggs?
Traditional recipes rely on eggs for structure and creaminess, but you can substitute with 1/4 cup cornstarch per egg for a similar texture. The flavor will be slightly different, but it'll still hold together when chilled. For the marshmallow topping, the cream cheese base remains the same—just omit the egg-based pudding layer.
How do I know when the pudding is fully set?
After chilling for 4+ hours, the pudding should hold its shape when gently shaken. If it wobbles slightly, it needs more time. For serving, it should be firm enough to slice cleanly but still creamy. The marshmallow topping should have crisp edges—if it's still soft, broil for 30 seconds more.
What's the best way to reheat leftover pudding?
Microwave in 15-second bursts on low power, stirring between each interval. For a smoother texture, place the pudding in a small oven-safe dish and warm at 300°F for 8-10 minutes. Never reheat the marshmallow topping—it loses its texture when warmed. Serve immediately with fresh whipped cream.
Can I use instant pudding mix instead?
While possible, you'll miss the rich, homemade depth this recipe delivers. Instant mixes often contain stabilizers that alter the texture. If you're short on time, look for a premium chocolate pudding mix (like Betty Crocker's "Homestyle") that requires eggs—it'll be closer to the real thing. For authenticity, stick with the traditional method!